To factory reset your Google Nest Audio, press and hold the microphone mute button on the back of the device for about 15 seconds. You’ll hear a chime indicating the reset process has started. This action wipes all settings, unlinking it from your Google account and returning it to its original factory state. Use this when troubleshooting issues or before giving away your device. Remember, factory resetting erases personalized data, so ensure you’re ready to reconfigure the device afterward.
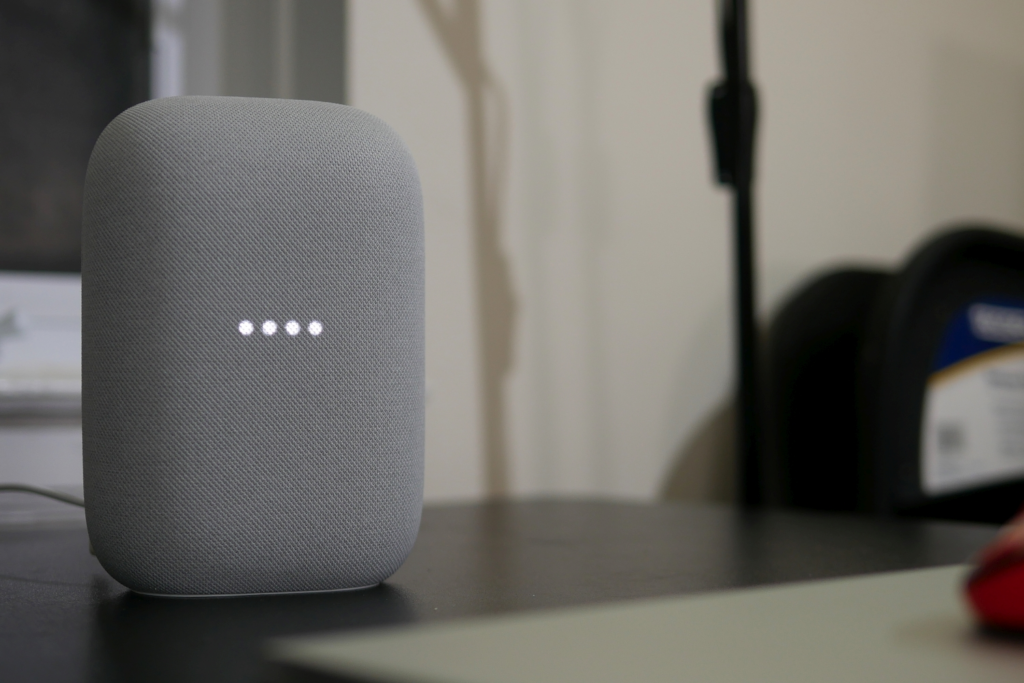

Table of Contents
The Google Nest Audio is a versatile smart speaker that seamlessly integrates into your smart home ecosystem. With its premium sound quality, sleek design, and the convenience of Google Assistant, it offers hands-free control for music, smart devices, and essential daily tasks.
Like any tech device, there may come a time when a factory reset becomes necessary. Whether it’s to resolve glitches, prepare the device for resale or gifting, or start anew with fresh configurations, resetting restores your Google Nest Audio to its default settings, ensuring optimal performance. Below, we explore key reasons for a reset and how to execute it efficiently.
Why You Might Need a Factory Reset
1. Troubleshooting Errors: Fixing Persistent Glitches
Over time, your Google Nest Audio might encounter glitches like delayed responses, dropped connections, or unresponsiveness. A factory reset can clear up software hiccups, restore default settings, and eliminate bugs that may interfere with performance.
2. Device Transfer: Preparing for a New Owner
Factory resetting is essential to sell, gift, or transfer your Google Nest Audio. It removes your personalized settings, Google account, and any linked smart devices, ensuring the following user can set up the device as new without accessing your data.
3. Reconfiguration: Starting Fresh with New Preferences
Sometimes, you might want to reconfigure your Google Nest Audio for a new network, account, or set of preferences. Whether changing households, switching accounts, or setting up new smart home integrations, a factory reset provides a clean slate.
By understanding these scenarios, you can decide when a factory reset is necessary to maintain or enhance the functionality of your Google Nest Audio.
Step-by-Step Guide to Factory Resetting Google Nest Audio
Resetting your Google Nest Audio is a quick and straightforward process. Here’s a detailed breakdown of the steps to ensure you reset your device effectively:
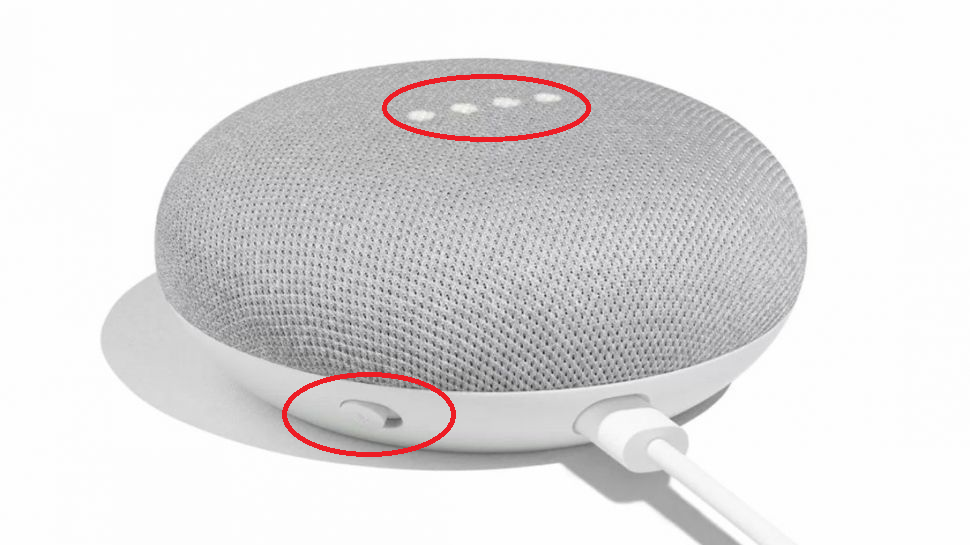
1. Locate the Mute Button
- On the back of your Google Nest Audio, you’ll find a small button labeled as the microphone mute button.
- This button mutes the microphone for privacy and also initiates a factory reset.
2. Initiate the Reset
- Press and Hold: Firmly press and hold the microphone mute button for 15 seconds without releasing it.
- Ensure you maintain a steady pressure, as releasing the button prematurely will interrupt the process.
3. Listen for Feedback
- After holding the button for the required time, the device will emit a chime or a voice prompt, signaling that the reset process has begun.
- The device will automatically restart as part of the reset procedure.
4. Reboot and Reconfigure
- Once the reset is complete, your device will return to its factory default settings.
- Open the Google Home app on your smartphone or tablet.
- Follow the on-screen instructions to set up the device anew, including connecting it to your Wi-Fi network, linking it to your Google account, and configuring any smart home integrations.
| Step | Action | Details | Expected Outcome |
| Step 1 | Locate the reset button | Find the reset button at the bottom of the Google Nest Audio. | The button is located on the back near the power cord. |
| Step 2 | Press and hold the reset button | Press and hold the reset button for about 15 seconds. | The Nest Audio’s LED light will turn orange, indicating it’s starting to reset. |
| Step 3 | Wait for the device to reset | Continue holding the button until you hear the confirmation sound. | The light eventually turns off and back on, signaling a successful reset. |
| Step 4 | Set up the device again | After the reset, you must set up your Nest Audio through the Google Home app. | Follow the on-screen instructions in the Google Home app to reconnect the device. |
| Troubleshooting | Resetting doesn’t work | Ensure the device is plugged in properly. Try holding the button for up to 30 seconds. | If it still doesn’t reset, consider restarting the device and retrying the reset process. |
Additional Tips for Success
- Keep Device Powered: Ensure the device remains plugged in and powered throughout the reset process.
- Stable Internet Connection: Ensure a strong and stable Wi-Fi connection when reconfiguring the device post-reset.
- Clear Setup Instructions: Refer to the Google Home app for guidance if you encounter any challenges during reconfiguration.
By following these steps, you can efficiently reset your Google Nest Audio, giving it a fresh start or preparing it for its next phase of use.
Troubleshooting Common Issues During a Google Nest Audio Factory Reset
While resetting your Google Nest Audio is typically a simple process, there may be occasional hiccups. Here’s how to address common issues you might encounter:
1. Device Doesn’t Respond
If your Google Nest Audio fails to respond when attempting a reset:
- Check Power Connection: Ensure the device is plugged into a working power outlet and the power adapter is securely connected.
- Inspect Connectivity: Verify that the device is connected to your home network and hasn’t lost Wi-Fi signal.
- Restart the Device: Perform a soft restart by unplugging the device, waiting 10 seconds, and plugging it back in before retrying the reset.
2. Reset Not Completing
If the reset process doesn’t seem to finish or triggers no response:
- Perform a Power Cycle: Unplug the device from the power source, wait 30 seconds, and then plug it back in.
- Reattempt the Reset: Once the device has rebooted, press and hold the microphone mute button for the required duration (15 seconds) to initiate the reset.
- Check Physical Buttons: Ensure the mute button isn’t jammed or malfunctioning, which could impede the reset process.
3. Persistent Issues After Reset
If problems persist even after a successful factory reset:
- Update Firmware: Open the Google Home app, navigate your device settings, and check for pending software or firmware updates. Keeping the device updated ensures optimal performance.
- Reconfigure the Device: Double-check that the Google Home app completes the setup process correctly.
- Contact Support: If the device remains unresponsive or problematic, contact Google’s customer support for advanced troubleshooting or repair options.
Proactive Steps to Avoid Reset Issues
- Test Your Network: Ensure your Wi-Fi network is stable and functioning properly.
- Keep Your Device Updated: Regularly check for updates to prevent bugs that may require a reset.
- Handle With Care: Avoid physical damage to the buttons or power adapter, which can hinder functionality.
By following these tips, you can address and resolve most challenges during the factory reset process, keeping your Google Nest Audio performing at its best.
Tips for a Smooth Factory Reset
Resetting your Google Nest Audio is straightforward, but a few preparatory steps can ensure it goes seamlessly and avoids unnecessary complications. Here are some practical tips to make the reset process smooth and effective:
1. Backup Your Settings
- Before initiating a reset, take note of your current configurations.
- Write down or screenshot key preferences, such as linked accounts, smart device integrations, and custom routines.
- This will save time when reconfiguring the device after the reset.
2. Secure Your Data
- To protect your personal information, unlink your Google account from the device.
- Open the Google Home app, select the device, and choose the option to remove it from your account.
- Disconnect paired smart devices to avoid potential control conflicts or access issues later.
3. Reconfirm Ownership Transfer
- If the reset is part of preparing the device for a new user, double-check that the recipient can access the required setup tools.
- They’ll need the Google Home app and an active Google account to complete the configuration process.
- If necessary, share instructions on setting up the device to make their experience easier.
Following these steps ensures your reset process is hassle-free, your data remains protected, and the device is ready for its next use phase.
FAQ’s
How to do a factory reset on a Google Nest Audio?
- Locate the microphone mute button on the back of the device.
- Press and hold the button for 15 seconds.
- Listen for a chime or voice prompt confirming the reset.
How do I reset my Nest Connect to factory settings?
- Remove the device from the Nest app.
- Press and hold the button on the device until the LED blinks yellow, then release.
How do I reset my speakers to factory settings?
- For most Google Nest or Home speakers, press and hold the microphone mute button for 15 seconds until a chime or prompt confirms the reset.
How do I reset Google Nest for a new owner?
- Factory reset the device (as described above).
- Remove the device from your Google Home app to unlink your account.
What happens if I factory reset my Nest?
- All personal settings, data, and configurations are erased. The device returns to its default factory settings.
How do I remove a Google Nest from another account?
- Open the Google Home app, select the device, and choose “Remove device” to unlink it.
How to factory reset Google Nest Protect?
- Press and hold the Nest Protect button until it starts speaking.
- Continue holding until it announces that it’s erasing all settings.
Can I delete my Nest account and start over?
- Nest accounts are tied to your Google account. To start over, unlink devices, delete configurations, and re-add them to a new or existing Google account.
How do I remove a device from Google Nest?
- Open the Google Home app.
- Tap the device, go to settings, and select “Remove device.” Confirm the action to unlink it.
FAQ’s
How do I reset my nest without the app?
- Nest Thermostat:
- Press the ring on the thermostat and go to Settings > Reset > Factory Reset.
- Follow the on-screen instructions to confirm the reset.
- Nest Protect:
- Press and hold the button on the device until it starts the reset process.
- Nest Cam:
- Locate the reset button (see next question) and press and hold it for 10-15 seconds.
How can I factory reset Google Nest?
- Nest Thermostat:
- Press and hold the ring until the settings menu appears. Then go to Reset > Factory Reset.
- Nest Cam or Nest Doorbell:
- Find the reset button on the device (usually on the back or underside).
- Press and hold the button for 10-15 seconds until the light indicator blinks or changes colors, signaling the device is resetting.
- Nest Protect:
- Press and hold the button on the device for at least 10 seconds until it begins to reset.
How do I reset my nest to manual mode?
- If you want to set the Nest thermostat to manual mode (without smart controls):
- Go to the Thermostat Settings on the device or the Google Home app.
- Select Mode and choose Heat, Cool, or Off as your manual setting, depending on your preference.
What happens if I factory reset my Nest?
- Factory Reset will erase all your settings, preferences, and network connections from the device.
- The device will be returned to its original state, and you’ll need to set it up again as if it were new.
- You may need to log into your Google account and reconfigure any settings related to smart home controls, temperature, schedules, etc.
Where is the Heat Link button on Nest?
- The Heat Link button on a Google Nest Thermostat is typically located on the front or side of the Heat Link device (for Nest E and 3rd generation models) that connects to your heating system. It’s used to pair and reset the device.
Where is the factory reset button on the Nest camera?
- The factory reset button on a Nest camera is usually located on the back or bottom.
- For most models, press and hold the reset button for about 10 seconds until the camera’s light blinks, indicating it is resetting.
- After the reset, you can reconfigure the camera through the Google Home app.
Conclusion
Factory resetting your Google Nest Audio is a practical solution for troubleshooting or starting anew. Whether addressing performance issues, transferring ownership, or reconfiguring your smart home setup, this process optimizes your device’s functions. Taking the time to prepare for the reset—backing up settings, securing data, and ensuring a smooth transfer—can significantly affect the outcome.
Share your Thoughts
What about you? Have you ever reset your Google Nest Audio? How was your experience? Share your insights, tips, or challenges in the comments below—we’d love to hear your story!